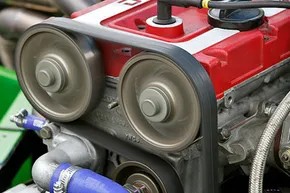
Engine timing isn’t just a metric in a manual. It is the heartbeat of combustion. When an engine is timed correctly, fuel burns efficiently. You get maximum power from every injection. The pistons, valves, and camshafts move in lockstep. They don’t collide. If they do, you are looking at a wrecked engine.
Most modern cars handle this via computer. Electronic control units adjust ignition timing in milliseconds. But the majority of vehicles on the road still rely on mechanical systems. If your car has a distributor and a timing belt or chain, you likely need to perform static timing.
This method sets the ignition point without firing the engine. It is the opposite of dynamic timing, which requires the engine to run and a costly timing light or oscilloscope. Dynamic timing is precise but intimidating. Static timing is accessible. It can be done in a driveway with a few basic tools. The cost is roughly equivalent to a few cases of decent beer. If you can pop the hood and identify the distributor, you can do this. Hot rodders and track enthusiasts swear by it.
When Static Timing Is Necessary
Why does timing drift? Engines are precision machines. They wear.
Over time, components degrade. The timing chain stretches. The distributor gear wears down. This causes the ignition cycle to fall out of sync with the piston position. You will hear it before you see it. Pinging or knocking sounds indicate the air-fuel mixture is igniting at the wrong moment.
If the timing is slightly off, fuel economy drops. Efficiency plummets. The engine runs rough. If it slips further, the consequences are severe. Pistons may strike open valves. This destroys the engine. A full replacement or an extensive valve job becomes necessary.
You should consider static timing in these scenarios:
- The engine knocks or pings under load.
- You have replaced the timing belt or chain.
- You are installing a new or rebuilt engine.
A standard four-stroke engine rotates the crankshaft twice for every single power stroke. The camshaft rotates once. The synchronization is unforgiving. There is no room for error.
Timing belts typically last around 60,000 miles (96,561 km). The rubber ages. The teeth wear. If the belt fails, the valves and pistons collide. The belt itself is cheap. The repair is not. If you are tearing down the engine for a repair, re-timing is mandatory during reassembly.
Static timing is also the safest way to break in a new engine. If you installed a crate engine or had a machine shop perform major work, static timing ensures the first start is safe. It prevents the initial firing from causing catastrophic damage.
The Static Timing Process
Static timing is about setting the baseline. You are aligning the distributor rotor with the number one cylinder spark plug wire. This must happen when the piston is at Top Dead Center (TDC) on its compression stroke.
You will need a timing light, a tachometer, and a way to access the timing marks. Most engines have a pointer on the front cover and notches on the crankshaft pulley. Some older vehicles have marks on the harmonic balancer.
- Locate the timing marks. Clean them if they are greasy. Use white paint or chalk to make them visible.
- Find TDC. Rotate the engine manually until the pointer aligns with the TDC mark. Ensure the piston is on the compression stroke. You can verify this by removing the spark plug for cylinder one and feeling for pressure with your thumb.
- Install the distributor. Place the distributor into the housing. The rotor should point toward the terminal for cylinder one.
- Connect the timing light. Attach the clamp to the battery, the ground to the engine block, and the probe to the number one spark plug wire.
- Set the base timing. Start the engine. Let it idle. Shine the timing light on the crankshaft pulley. Rotate the distributor housing until the timing marks align with the specified degree. This is usually specified in the service manual, often around 10 to 12 degrees Before Top Dead Center (BTDC).
- Check the advance. Once the base timing is set, the centrifugal advance mechanism in the distributor will take over as RPMs increase.
This method does not account for vacuum advance or modern engine load sensors. It sets the foundation. The engine management system or mechanical advances will handle the rest.
It is not perfect. It doesn’t simulate real-world driving conditions. But it gets the engine running. And running is better than not.
Why Mechanics Still Use It
Modern diagnostics are powerful. OBD-II scanners read live data. They show ignition timing in real-time. Why go back to a timing light?
Because computers can be fooled. Sensors fail. Wiring corrodes. A scanner might tell you the timing is perfect while the engine knocks because the sensor is lying. Static timing is physical. It is mechanical truth.
It is also faster for simple adjustments. If you hear a ping, you don’t need to dig through codes. You check the marks. You adjust the distributor. You check again. It is direct.
For classic cars and older performance vehicles, static timing is often the only viable method. Many of these engines lack the electronic sophistication for dynamic tuning. They rely on the mechanical advance curves built into the distributor.
If you are working on a vintage muscle car, a classic BMW, or an old Honda, static timing is your friend. It respects the mechanics of the era. It doesn’t rely on software that no longer exists.
Common Mistakes to Avoid
People rush this process. They assume TDC is where the light blinks. It is not. The light blinks when the spark fires. The spark fires before TDC. This is the “advance.”
If you align the marks while the engine is running, you are setting the timing at idle, not at TDC. This is a critical distinction. Static timing sets the reference point. Dynamic adjustment fine-tunes it.
Another error is ignoring the distributor gear wear. A worn gear can cause the distributor to jump teeth. This shifts the timing randomly. If you replace the timing belt, you should replace the distributor gear as well. It is cheap insurance.
Also, check the vacuum lines. A disconnected vacuum line will cause the engine to run lean and hot. It mimics advanced timing. Always plug in the vacuum hose when checking static timing. The mechanical advance is the only thing that should be active.
“Static timing is the anchor. Everything else rides on it.”
If the anchor is wrong, the rest is chaos. The engine may run. It may even seem normal. But it will not perform. It will not last.
The beauty of static timing is its simplicity. It requires no laptop. No expensive adapters. Just a light, a wrench, and a willingness to look closely.
You are aligning metal. You are listening to the engine. You are making it breathe correctly.
It feels like cheating sometimes. The computer does so much work now. But there is a satisfaction in getting it right by hand. In knowing exactly where the spark happens relative to the piston. It is a connection to the machine that sensors can’t provide.
The engine fires. It runs. The knock is gone. The idle is smooth.
You did it. Now, drive
Getting the timing right is usually just the beginning of a bigger job, like swapping out a timing belt. Before you wrestle with camshafts and crankshafts, you need a plan. Start by finding the timing marks on the flywheel and cam pulley. If those notches are worn smooth or caked in grime, don’t risk losing them later. Take a minute to mark them with white paint. It sounds trivial, but hunting for a faint line while your hands are full of tools is a nightmare you don’t need.
You only need two main tools for this static timing procedure: a socket wrench sized for your engine’s crank bolt and a test light. The test light looks like a big screwdriver with two wires attached to the back. One wire clips to a ground source, and the other connects to the power side of the circuit you’re testing—usually the distributor in older ignition systems. Skip the cheap versions that lack a ground wire. They cost pennies less but make your life significantly harder. When you touch the probe to a live terminal, the bulb in the handle lights up. That’s all it takes to tell you if electricity is flowing.
Finding Top Dead Center
The goal here is to get the number one piston to top dead center (TDC). This is the point where the piston is at the very top of its stroke. You’ll find the TDC mark on the crankshaft pulley or sometimes the flywheel. Your shop manual will tell you the exact degree specification for your engine—whether it’s set exactly at TDC or a few degrees before it. This variation exists because the valves need to be closed at this specific moment for the ignition spark to be effective.
Use your wrench to hand-crank the engine clockwise. Stop when the TDC mark aligns with the seam on the crankcase. If you overshoot, don’t keep turning forward. Back off about 30 degrees counterclockwise, then creep forward again to TDC. Precision matters here.
Aligning the Distributor
Remove the distributor cap. Inside, look for the rotor and a small notch molded into the distributor’s base. The rotor should point toward this notch when the number one piston is at the firing position. If the engine has been rebuilt before, that alignment might be off. Loosen the distributor hold-down clamp bolt to give yourself some play.
Turn the ignition key to the “on” position. Do not crank the engine. You just want the battery power flowing to the ignition system. If the starter engages, you’ve messed up the sequence. Shut it off, go back under the hood, and start the alignment process from the top.
The Test Light Method
Clip the test light’s ground lead to a solid chassis ground. Touch the probe to the primary terminal of the ignition coil or the distributor wire. The light should glow. If it doesn’t, check your connections.
Now comes the adjustment. Turn the distributor body slightly clockwise until the test light goes out. Then, rotate it counterclockwise, slowly, until the light just begins to illuminate. You aren’t looking for a wide zone of brightness. You want the exact moment the filament catches fire. That’s your static timing point. Tighten the distributor clamp securely.
This is static timing. It’s a baseline. For your engine to run smoothly, deliver good fuel economy, and actually drive without hesitation, you’ll eventually need to perform dynamic timing adjustments with a strobe light while the engine is running.
Break-In and Verification
If you’ve built a new engine, wait until the break-in period is complete before finalizing your timing settings. Thermal expansion and contraction of metal components during the first few hundred miles can shift timing slightly. It’s normal. If your engine is older, warm it up first. Cold engines behave differently than hot ones.
To verify your work, crank the engine counterclockwise a quarter turn, then bring it back up to TDC slowly. If your timing is set correctly, the test light will flash precisely as the marks align. If it flashes early or late, you missed the mark. Start over. It’s not complicated, but it does require patience.