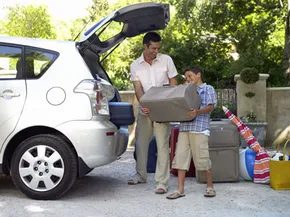
Let’s be honest. Between the fertility treatments that often double your family size and the sheer volume of gear required to keep kids entertained on a road trip, your average sedan is crying for help. You don’t have to leave a child behind to fit an extra suitcase. The solution isn’t buying a massive conversion van or a truck you can’t parallel park. It’s looking up. Or rather, looking back.
Cargo carriers have evolved from simple plastic bins to sophisticated, high-capacity hauling systems. They let you transport high-end mountain bikes, bulky luggage, or skis without sacrificing interior legroom. You can take your favorite space-hogging hobbies on the road without dropping tens of thousands of dollars on a larger vehicle. The question isn’t whether you need one. It’s which type fits your driving habits.
Roof Racks vs. Hitch Carriers
Your choice depends entirely on your vehicle and your cargo. If you drive a station wagon and just need extra trunk space, a roof rack system is the standard go-to. It keeps the interior pristine and accessible. But if you’re in a mid-size SUV and love camping, a trailer hitch cargo carrier might be your best bet.
Hitch-mounted carriers sit lower, making them easier to load. They also don’t add significant wind resistance, which can help with fuel economy compared to bulky rooftop boxes. Roof racks, however, offer versatility. You can mount crossbars for bike racks, ski clamps, or cargo boxes. Both options keep your family comfortable inside. The choice is about weight distribution and ease of access.
Installation: Surprisingly Simple
You might think installing a cargo carrier requires a mechanic and a degree in engineering. It doesn’t. Most systems are designed for DIY installation. The heavy lifting is already done by the manufacturer. You just need a few basic tools and some patience.
“Regardless of whether your cargo carrier is roof-mounted or hitch-mounted, the installation process is often simpler than expected.”
For hitch carriers, you’ll typically need to remove the factory hitch cap, insert the carrier, and secure it with a pin and clip. Some models include anti-wobble devices to prevent rattling at highway speeds. Roof rack installation involves mounting crossbars to your vehicle’s roof rails or fixed points. Once the bars are secure, you can attach your specific carrier, box, or rack.
The key is reading the manufacturer’s instructions carefully. Torque specifications matter. Loose hardware leads to dangerous failures. Tighten everything to spec. Then, give it a shake test before hitting the highway.
Why This Matters for Modern Families
The effectiveness of modern fertility drugs means families are larger and more complex than ever. Traveling with three, four, or more kids requires logistical precision. A cargo carrier isn’t just a convenience. It’s a necessity for maintaining sanity on long trips. You can pack what you need without turning your vehicle into a storage unit.
Whether you’re heading to the slopes or the campsite, the right carrier makes the journey smoother. It keeps your vehicle balanced and your passengers happy. And it saves you from the expense of a larger vehicle you’ll rarely use to its full capacity.
Stay tuned for the next section, where we’ll dive into specific installation steps for hitch-mounted carriers. You’ll be surprised how easy it is.
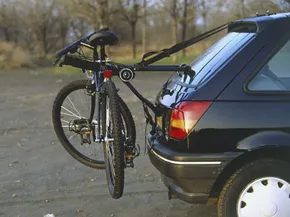
The Great Debate: Roof Rack or Hitch Mount?
Where does your extra gear go? The roof or the back? It’s not just about preference; it’s about physics and parking tickets.
Roof-mounted carriers give you more surface area. You can stack it higher. But you sacrifice aerodynamics. Your MPG drops. You also need to watch your height. Hit a garage door in a parking deck? Ouch. Rear-mounted carriers save your aerodynamics. They don’t stick up into the wind. But your cargo becomes a target. Rear-enders become your biggest fear.
Pick your poison. Then let’s get it installed.
Installing a Roof-Mounted Carrier
Start with the manufacturer’s instructions. Seriously. Don’t skip them.
You need a roof rack. Many SUVs, wagons, and minivans come with them. Some sedans, too. If yours doesn’t have one, you have to add it.
Old school? Drill holes. Painful. Damages the paint. Leaves rust waiting to happen.
New school? Clamp-on systems. They grab your rain gutters. Those curved metal strips guide water away from your windows. They’re strong. They hold weight. But check your specific vehicle. Rain gutter designs vary wildly. Get a rack made for your exact make, model, and year. Don’t guess.
Once the rack is on, look at the bars. You need two stationary side rails running front-to-back. And at least two movable crossbars running side-to-side. This grid holds the cargo.
You have three main options for the box itself:
- Luggage baskets. Open frames. Good for bikes. Kayaks. Bulky items.
- Cargo boxes. Hard-shell. Enclosed. Waterproof. Secure. Fits everything.
- Cargo bags. Soft shell. Like a box, but made of fabric. Less durable. Cheaper.
Most carriers use the width between the crossbars for stability. Slide them apart. Place the carrier’s brackets over the bars. Tighten the screws. It’s a clamp system. Simple. Secure.
Check the tightness. Especially on long trips. Vibration loosens things. Loose things fall off.
The Rear-Mounted Alternative
No roof rack? No problem. Look at the hitch.
Almost all rear carriers use a trailer hitch. Many cars have them installed. If not, add one. A 1-1/4-inch (3.175 cm) interchangeable hitch is standard. It lets you swap between a tow ball and a cargo carrier. Flexible. Useful.
Rear carriers slide right into the hitch. A cargo tray is just like a roof basket. Sturdy frame. Slides in. Locks down.
Need a different receiver size? Use an adapter. They’re cheap. They work. Don’t overcomplicate it.
Additional Parts Needed for Cargo Carriers
You’ve got the carrier on. You’ve got the brackets tight. But wait. There’s more.
Consider the extras. Straps. Locks. Covers. Each adds a layer of security. Or convenience. Or both.
“A cargo carrier is only as good as its installation.”
Check the manual again. Look for the small print. The torque specs. The warning labels. Ignore them at your peril.
The road is rough. Cars vibrate. Metal fatigues. Check everything. Again. And again.
Does your carrier block the license plate? Rear lights? You’ll need an extension. Or a bracket. Check local laws. Fines are worse than the hassle of buying the right part.
Security matters. Not every carrier comes with a lock. Some do. Some need an aftermarket lock kit. Theft is real. Especially for expensive gear. Don’t leave your kayak out like free real estate.
Weather? If you’re using a soft bag, get a cover. Hard boxes usually seal themselves. But check the gaskets. A single tear lets in rain. Ruins the contents.
Weight distribution? Don’t load it all in the back. Spread it out. Keep the center of gravity low. Even on a rear carrier. Your handling will thank you.
What about cleaning? Cargo carriers get dirty. Road grime. Bird droppings. Salt from winter roads. Clean them regularly. Check for corrosion. Especially on the metal brackets. Rust weakens the connection. Weak connections fail.
And what about removal? Do you take it off when you don’t need it? Aerodynamics return. Fuel economy improves. But removal is a chore. If you leave it on, does it fit in your garage? Your driveway? Measure twice. Cut once. Or in this case, mount twice.
There’s always a detail you missed. The manual mentions it. The comments section warns you. The guy at the hardware store knows. Pay attention.
The drive is long. The gear is heavy. The road doesn’t care about your mistakes. Prepare properly. Install correctly. Drive safely.
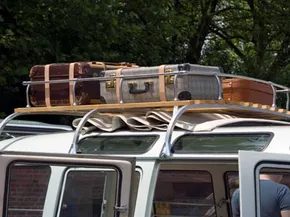
Securing the Load: Essential Accessories for Roof and Rear Racks
You can’t just throw a bike or a pile of suitcases into a roof basket and hit the highway. Gravity doesn’t care about your vacation plans, and without proper restraints, your gear will vanish somewhere between the exit ramp and the rest stop.
The suitcase issue is low-tech and easy to solve. A simple cargo net that snaps to your crossbars keeps bags from sliding. For better protection against rain and debris, throw an all-weather cover over the mix. It’s cheap insurance for your stuff.
Bikes, kayaks, and surfboards need more than just straps. You need specialized carriers designed to hold these long items upright and stable. Ski racks do the same for skis and snowboards. Look for models with a support bar that rests on your crossbars. The bike sits in this bar, held tight by fasteners. Some rear-mounted baskets offer similar accessory mounts.
Preventing Theft and Ensuring Visibility
Invest in good locks. Thieves are opportunistic. Cargo boxes usually have locks built-in, but aftermarket options exist for almost every carrier type, including snowboard racks. If you use a rear-mounted carrier, lock the hitch too. That way, thieves can’t take your cargo and the carrier in one swipe.
Safety is just as important as security. Roof boxes don’t block brake lights, but rear-mounted carriers often do. If you’re carrying gear on the back, buy a brake light kit. These lights mount to your carrier and sync with your brake pedal. Check under the rear of your car; there’s often a plug ready for this. Most kits just plug in. Some carriers come with built-in lights.
With the right carrier and accessories, you’re ready for the road. More space. More comfort. Just make sure everything is locked down tight.
For more on towing and related gear, check the next page.
Lots More Information
Related Articles
- Is there a green way to tow?
- 10 Tips for Easy Towing
- How Tongue Weight Works
- How Snowboarding Works
- How Brakes Work
Great Links
- Yakima
- Thule Racks
- Trailer Hitch Universe
Sources
- “Frequently asked rack questions.” Rack Attack.
- “Load Warrior.” Yakima.
- “Technical support and instructions for roof mount bike rack #64720.” Pro Line Racks.
- “Thule Terrapin cargo box.” Auto Anything.
- “Time Travel series.” Thule Car Rack Systems.