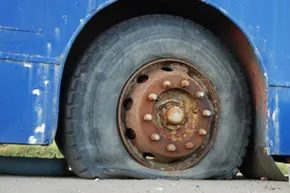
Let’s be honest about tires. They wear out. They get punctured. They fail. It is not a matter of if, but when you will be stranded with a dead rubber tire on the shoulder of a highway. You can try to avoid it with regular checks, but eventually, you will hear that distinctive flap-flap-flap. Or feel the steering wheel shudder. The outcome is the same. You are stopped.
Panic is not a strategy.
Knowing how to change a flat tire is not just about survival. It is about autonomy. When you have the skill, you are not at the mercy of a tow truck driver who might be forty minutes away or a roadside assistance plan that has a three-hour hold time. You are solving the problem in minutes. This matters if you have a meeting. It matters if you are traveling alone at night. It matters if you just want to keep your wallet intact.
Road service clubs are fine. They are reliable. But they are also slow. A tow truck is a slow solution. A tire change is fast. It costs nothing but twenty minutes of your time and a bit of elbow grease.
The process is not complex. Car manufacturers have stripped away the mystery. You do not need to be a mechanic. You need to be prepared. The difficulty level sits right next to checking your oil. It is basic maintenance. It is essential.
Why You Must Learn This Skill
There are clear reasons to ditch the reliance on professional help for a simple flat.
Time and Cost Control
Calling for help introduces variables you cannot control. Wait times vary. Fees vary. Your schedule is disrupted. Doing it yourself removes the variable. You fix the car. You leave.
Safety and Independence
Being stranded on a busy road is dangerous. Being stranded with the knowledge to fix the issue is safe. You regain control of the situation. You are not waiting for a savior. You are the savior.
Skill Retention
If you never learn how to change a tire, you never will. It is a binary skill. You know it, or you don’t. There is no middle ground. Learning it now saves you from panic later.
What You Need Before You Start
You do not need a garage. You need a few specific tools. Check your trunk. Most modern cars come with a spare tire and a jack. Some come with a lug wrench. Some do not. If you lack a wrench, you can often use the car’s own tools or borrow one. But having them ready is key.
Ensure your spare tire is inflated. A flat spare is a useless spare. It is a placeholder for a panic attack.
The Process: Step-by-Step
You do not need to understand the physics of torque. You just need to follow the steps.
-
Park on Level Ground
Find a flat, stable surface. Avoid grass. Avoid dirt. Concrete or asphalt is best. Engage the parking brake. Turn on your hazard lights. -
Loosen the Lug Nuts
Do not remove them yet. Just break the tension. Use the wrench. Turn counterclockwise. If they are stuck, use your foot. Stand on the wrench. Leverage is your friend. Do
Essential Gear for a Flat Tire
You don’t need a mechanic’s degree to swap a rubber donut. Most modern vehicles come with the basics. Check your owner’s manual. It tells you exactly where the jack and wrench are hiding and how to operate them. But relying solely on stock equipment is risky. You need a plan.
Your car likely includes a scissor jack, a lug wrench, and a spare tire. That’s the holy trinity of roadside repairs. But depending on your make, model, and year, you might need more. Some cars require wheel locks. Others need extension bars for under-car spare mounts. A few use alignment studs that complicate the whole process.
Jacks and Wrenches: The Heavy Lifters
Jacks aren’t all created equal. You’ll see scissor jacks, floor jacks, bottle jacks, and even bumper jacks. The scissor jack is the standard. It uses a mechanical screw mechanism to lift. It’s compact. It’s cheap. It works. A bottle jack is more powerful but bulky. It uses hydraulic fluid. You won’t find it in most trunks.
Before you lift a single inch, you must deal with the lug nuts. These nuts hold the rim to the wheel hub. You can’t remove the flat without loosening them. Use the lug wrench. It’s essentially a large socket wrench. One end has a socket that matches your wheel nuts. The other end is a pry bar.
The length of the handle matters. Longer handle equals more mechanical advantage. You need leverage to break those nuts free. Once loose, pop them off. Use the pry bar end to remove hub caps or pry a stuck rim off rusted studs.
Choosing the Right Spare
You have two choices for a replacement tire. Full-size or temporary.
A full-size spare matches your other tires. It’s safer. It handles highway speeds better. But it’s heavy. Hard to store. Tough to lift into place, especially in a compact car.
Most cars come with a donut spare. Also called a “space saver.” It’s lighter. Easier to stow. Simpler to mount. But it’s not built for longevity.
Here’s the catch. Donut spares are temporary. Limit your speed to under 50 mph (80.5 km/h). Keep your range under 60 miles (96.6 km). Drive easy. Get to a shop. Check the air pressure in that spare regularly. It takes two minutes. It saves hours of panic later.
The Annoying Extras
Not every car needs these, but if you have them, don’t ignore them.
Wheel locks are keyed lug nuts. They stop thieves. They also stop you if you lose the key. Keep the locking socket taped to your jack or inside your glove box. Don’t let it get buried under floor mats.
Some vehicles lower the spare from underneath. You turn a post to drop it down on a cable. Use an extension bar for this. It’s the same bar used to pull the spare out. Check this mechanism. Rust and corrosion love these hidden spots. Ensure it moves freely before you’re stranded on a highway.
European cars love wheel bolts over wheel studs. Studs stay on the hub. You hang the tire on them. Easy. Bolts screw into the hub. They come off with the tire. Putting it back on requires threading the bolt through the rim hole. It’s difficult. It’s frustrating. Do it on the side of a busy road? Good luck.
Beyond the Stock Kit
Professionals recommend carrying more than just the manufacturer’s kit. The roadside is rarely clean. It’s rarely safe.
- Flashlight : With extra batteries. Night changes are dangerous.
- Surgical gloves : Keep grease off your hands.
- Tarp or mat : Don’t kneel on wet gravel.
- Plastic rain poncho : For wet roads or kneeling.
- Tire pressure gauge : Check the spare before you need it.
- Tire blocks : Prevent the car from rolling.
- Road flares or reflective triangles : Warn approaching traffic.
- Plywood sheet : If the ground is soft, the jack will sink. A 12×12-inch sheet of heavy plywood creates a stable base.
Pack these in a small case. Add jumper cables. A space blanket. Water. Food.
The ideal flat tire change happens on a dry, level shoulder. It rarely does. Flats happen at night. In rain. On soft dirt. Having the right tools means you’re not just reacting. You’re prepared.
Most people forget to check their spare pressure until the tire blows. By then, it’s too late. The gauge costs five dollars. The peace of mind is priceless.
The jack might slip. The lug nuts might be seized. The weather turns. You do your best with what you have. And you hope the other drivers are paying attention.
You don’t have time to overthink it when a sidewall blows out. Your immediate goal is getting off the road. Ideally, you want a flat, level, and solid surface. A parking lot is perfect. If that’s not an option, look for any ground that won’t sink under the jack. Avoid hills. Soft dirt is a death sentence for a jack.
Spotting the Right Place to Stop
Part of good vehicle maintenance is knowing where to stop. You need to train yourself to scan the environment. Look for hard pavement. Stay away from slopes. Stay away from mud.
Once you’ve found a spot, get as far from moving traffic as possible. You don’t need the added danger of being hit by an inattentive driver while you’re kneeling in the dirt. Risk is minimized by distance.
Securing the Vehicle
Turn on your hazard lights. Do this before you even get out of the car. If your emergency flashers are out, you have a bigger problem than a flat tire. Checking these lights should be part of your routine maintenance.
Now, make sure the car can’t roll. Apply the parking brake. Shift into Park. If you drive a manual, throw it into reverse. Then, get out and chock the wheels.
You don’t need fancy tools for this. Large roadside stones work. Specially designed wheel wedges work. Anything that stops the car from rolling away is fine. Place the blocks in front of the front tires if you’re changing a rear tire. Place them behind the rear tires if you’re changing a front tire. Physics is on your side here.
The Spare and Tools Check
Hopefully, your regular automotive maintenance schedule gave you a chance to check the spare tire and tools. If not, now is the time to find out how lucky you are.
Remove the jack and lug wrench from the trunk. Grab the spare. If they’re rusted shut or missing, call a tow truck. Don’t try to improvise with broken equipment. If your gear is ready to go, keep reading.
Why You Should Rotate Your Tires
One of the chronic problems in roadside emergencies is a rim rusted or corroded onto the wheel hub. This is common on vehicles with aluminum rims and steel hubs. The chemical difference between steel and aluminum, especially when mixed with water and road salt, causes an electrolytic reaction. It breaks down the aluminum.
The result? A white powder builds up between the rim and the hub. It solidifies. The rim becomes nearly impossible to remove in an emergency.
Rotating your tires regularly helps prevent this. A mechanic at a repair shop can break the rust or corrosion between the rim and hub. This makes for an easier time when you actually have to change a tire. Regular rotation also extends the life of your tires by evening out tread wear.
As a general rule, rotate tires every 5,000 miles. Some manufacturers say 7,500. Check your owner’s manual. But don’t ignore it.
Lifting a vehicle that weighs a few thousand pounds isn’t magic. It’s physics, leverage, and basic safety protocol. Skip the steps. You end up with a crushed foot or a totaled sedan. The priority is keeping your limbs attached to your body.
Get everyone out. Stand at least 10 feet back. Ten feet. It doesn’t matter if you’re freezing, soaking wet, or baking in July. Do not crawl under a car supported only by a jack. A jack is a tool for lifting, not holding. One bump, one slip of the ground, and gravity takes over. If the car starts sliding or settling, clear the area. Let it drop. You can replace a bumper. You can’t replace your spine.
Locating the Correct Lift Points
Your owner’s manual is the bible here. Look for the jack points.
On unibody platforms, these are usually reinforced metal seams along the lower rocker panels between the wheel wells. Some manufacturers cover these with plastic clips or fascia panels. Don’t force the jack into the plastic. Look for the small cutouts or openings where the bare metal is exposed. If you crush the bodywork to get under it, you’ve already lost.
Frame-based trucks and SUVs have different markers. Look for a triangle stamped into the frame rail. It’s usually positioned just ahead of the rear axle and just behind the front axle. These are specific hard points designed to handle the stress.
Set the jack on firm, level ground. Raise it until it makes contact with the lift point. It should be supporting the weight but not yet lifting the car into the air. This confirms your alignment is correct before you commit to the lift.
Breaking Lug Nut Resistance
Pop the hub cap if it’s there. You need access to the fasteners.
Take your lug wrench. If you’re using the factory scissor wrench or a standard cross wrench, check your fitment. The wrench opening needs to slip over the nut with zero play. If it rattles, you’re rounding off the corners. If it’s too tight, you’ll slip and hurt your hand. Find the sweet spot.
Turn counterclockwise to loosen. Do not remove them yet. Just break the torque.
Why leave them on? Physics. When the wheel is on the ground, the friction between the tire and the asphalt keeps the wheel from spinning. The force you apply to the wrench goes directly into loosening the nut. Lift the wheel first, and the wheel just spins. You’re fighting air resistance and bearing friction. You want to fight the thread’s grip, not the wheel’s inertia.
Lug nuts on steel or aluminum wheels can be stubborn. Corrosion binds them. If your arm strength isn’t cutting it, use your body weight. Push down on the wrench handle. Stomp on it if you have to. Some enthusiasts carry a length of pipe to slide over the wrench handle for extra leverage. Just be careful not to strip the nut or hurt yourself if you slip.
Lifting the Vehicle
Once all lug nuts are broken loose, pump or crank the jack.
Lift slowly. Watch the car. Is it leaning? Is the jack shifting? If the jack lifts at an angle, stop. Lower it. Reposition it so it stands straight up. A crooked lift is an unstable lift.
Raise the tire just high enough to clear the ground. You don’t need to lift it to the roof of the garage. Just enough to remove the wheel and mount the spare.
If you hear any cracking or feel any shifting, lower the jack immediately. Fix the base. Ensure the ground is solid. Concrete is better than dirt. Dirt is better than gravel. Gravel is better than nothing.
Pull the lug nuts out. Slide the flat tire off. Set it aside.
The Aerosol Sealant Debate
Sometimes you don’t need to remove the wheel. If you have a small puncture in the tread crown—not the sidewall—you might use an aerosol tire sealant.
These cans inject a foam compound and propellant into the tire. It fills the hole and re-inflates the tire simultaneously. It’s a quick fix for a bad situation.
But there’s a catch. The automotive community is split on this.
Pros say it gets you home. Cons say it ruins the tire for good.
Many professional tire shops refuse to service a tire that’s been filled with sealant. They can’t verify the integrity of the patch afterward. The sealant clogs the valve stem and masks potential internal damage. Plus, the propellant pressure is unpredictable. You might end up with a tire that looks fine but is structurally compromised.
So, you get a “quick fix” that might require you to drive to a specific shop willing to tear apart a foam-filled mess. It’s a gamble. If you’re stranded in the middle of nowhere, it’s a lifesaver. If you’re near a garage, it’s often better to just change the wheel.
The sealant works. That’s not in dispute. The question is whether the convenience is worth the potential long-term cost and safety risk. Most mechanics will tell you it’s a temporary measure only. Treat it like that.
Securing the Spare
Slide the old wheel under the car’s frame before you fully remove the jack. It’s a cheap insurance policy. If the jack fails, that rubber and steel block takes the hit instead of your undercarriage. Assuming you’ve got a solid base and a good jack stand, you’re probably safe, but don’t bet on it.
Mount the spare. The deep side faces inward. Line up the holes. Hand-tighten the lugs. If your lugs have a cone shape, the tapered end goes toward the rim. It centers the nut. It locks it. If those bolts are rusted shut from years of neglect, you might need to start them with a wrench to avoid cross-threading, but keep it loose. We aren’t trying to crush the threads yet.
Tighten them in a star pattern. One nut. The one opposite it. Move over. Tighten the next pair. Four-stud and six-stud hubs work the same way: opposite pairs, then shift. You’re distributing pressure. Don’t use full arm strength now. The car is hanging in the air. Tighten just enough so the wheel doesn’t wobble or pop off when you drop it.
The Final Torque
Take that old tire out from under the car. Lower the vehicle until the tire touches the pavement. It’s bearing some weight, but not all of it. Now you tighten for real. Go back to that star pattern. Crank them down. Drop the car completely. Remove the jack.
Go over them one last time. Tighten as much as you can without stripping the studs. Put your tools away. Stow the jack. It belongs where it belongs. If you don’t, you’ll be digging for it during the next emergency. Toss the old tire in the trunk. Then call a pro. Have that flat repaired or replaced. Don’t drive around on a spare forever.
Proper Torque
Mechanics don’t guess. They use torque wrenches. Torque is just a measure of force. Specifically, the clamping force between the lug nut and the wheel stud. When you tighten a nut, you’re actually stretching the bolt slightly. It acts like a spring. That stretch creates the clamp that holds the wheel to the hub.
Too little force, and the wheel can come loose. You’ll lose the rim. Too much force, and you snap the bolt. Or worse, you stretch it into permanent deformation. A torque wrench prevents both.
Passenger car torque specs usually sit between 85 and 115 foot-pounds. That’s roughly 115 to 156 newton-meters. Check your manual. Not all cars are the same. Tighten in the correct sequence. Opposite nuts first. It spreads the clamping pressure evenly across the tire. If you tighten them in order, the rim warps. The seal fails. You get a leak. Or a shake.
The Bigger Picture
You’ve got the wheel on. It’s tight. But the real work starts when you hit the shop. Tires aren’t just rubber. They’re part of a complex system. From racing tech that ended up in your sedan to the digital brains managing your drive, there’s a lot going on under the hood and in the trunk.
“Using a torque wrench to measure and set this number assures the correct amount of force is on a nut and bolt for them to do their job correctly.”
If you want to know why your car handles the way it does, or how driverless tech will change the game, the links on the next page cover it. From hypercars to synthetic oil, there’s always another layer to peel back.